Supplies
Thin Suede or Leather Scraps
(2) Matching 3/4" Conchos or Prong-Back Spots
(2) 10mm Flat-Pad Earring Posts
Scissors
Adhesive
Pony Beads (optional)

|
|
Instructions
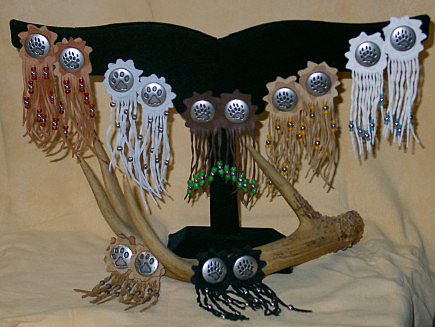
1. Using the stencils provided (print page), lightly trace your shapes on the back side of your leather scraps with a ballpoint pen. You will need to duplicate two (2) of stencil #1 and one each of stencil #2 and #3.
2. Following your pen lines, carefully cut out your traced designs with a sharp pair of scissors. Next, cut thin narrow fringe on the bottoms of leather pieces #2 and #3.
3. Attach decorative prong-backs to the front facing side of both leather pieces cut from stencil #1.
4. Using adhesive, glue flat-pad earring posts to the back side of both leather leather pieces cut from stencil one, opposite side of concho, and allow to dry.
5. Punch a small hole in the centers of both leather pieces cut from stencil #2 and #3. Carefully attach these fringed back pieces to the concho portion of your earring by poking post through the hole you provided and securing with a small drop of adhesive. Metal earring pad should now be sandwiched between both pieces of leather. Allow to dry.
6. Wet bottom fringe of earrings, and between thumb and forefinger, gently pull and twist each strand of fringe to thin and curl. This will add interest and dimension. It will also hold its shape once dry. While fringe is still wet, you can also thread beads onto your fringe if desired.